

几年前,作者在去日本的途中发现了一个小巧精致的机关盒,现在他凭借着心中的热爱和记忆复制了这样的一个盒子—来看看国外创客达人做的作品吧!
正文
The things you need are:
-Laser Cutte
-Any wood your laser cutter can work with (I used 3mm plywood)
-A little bit of wood glue
需要准备
-激光切割机
-3mm胶合板
-木工胶水
For this particular puzzle box, we need two separated boxes where one can be placed exactly into the other one. We want the gap between the boxes as small as possible but enough to pull them apart without any friction between the walls.
为了制作这个特别的机关盒,我们需要两个一大一小的盒子(小的那个能够紧密的装进大盒子里),盒子之间的间隙要做的尽可能的小,但又不至于大紧以至于拿不出来。内部小盒子的底盖和四周的边缘需要和外面的大盒子之间预先留好间隙。
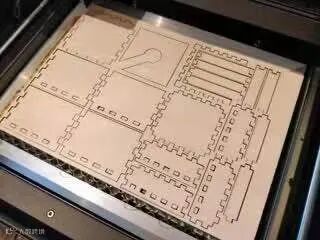
The pieces for the spacing are needed for the second bottom in the outer box and for the slide on lid in the inner box. The design you get from boxes.py has by default no slide on lid so I adjusted the vector to make some space for the lid. I used Affinity Designer for this process because it is a very good and cheap alternative to Adobe Illustrator. Inkscape will work great as well. Also, I added some additional shapes that are needed for the locking mechanism. I prepared all the parts for my laser cutter on two A4 sized sheets.
外盒的第二底部和内盒的盖子上的滑动部件都要制作间隔。boxes.py的初始设计默认没有盖子上的滑动部分,所以我调整了矢量原件。我在这个过程中使用Affinity Designer是一个Adobe Illustrator的优秀替代品,你们也可以用Inkscape完成。此外,我还添加了锁定机制所需的一些额外形状。所有为激光切割准备的板材都是A4大小尺寸。
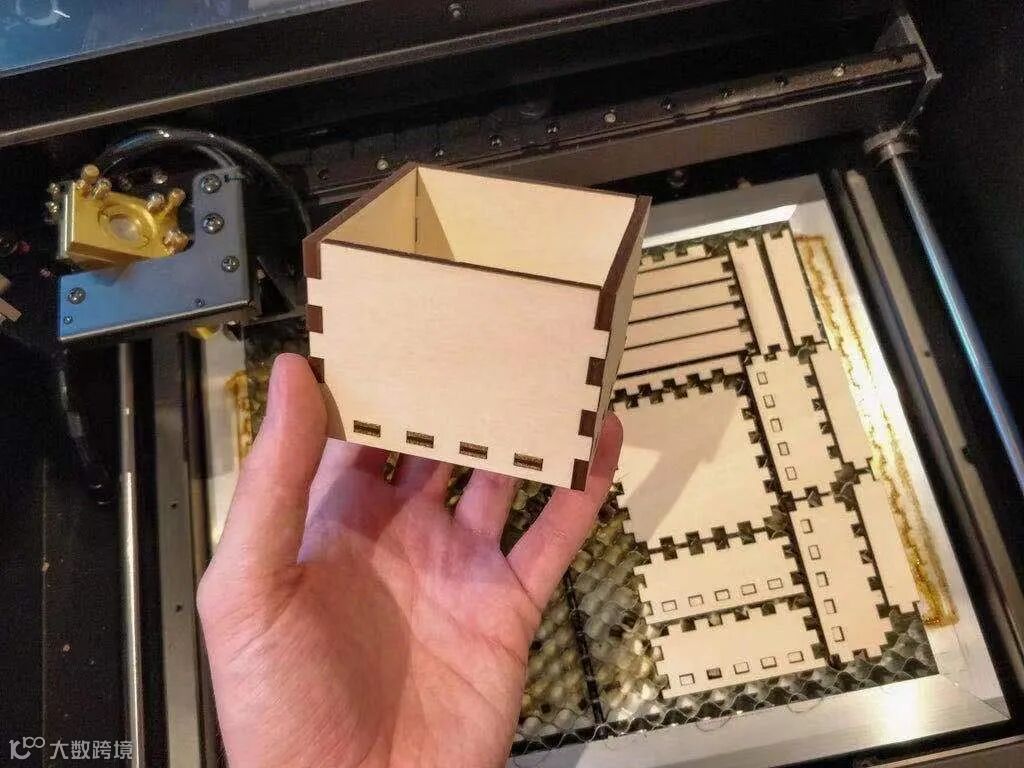
One all the parts are cut out the fun part starts. My pieces fit together so strong I almost didn’t need any glue to build the basic boxes. The additional parts as well as the inner spacings have to be glued in place as you can see in the photos.
零件咬合得非常紧,几乎不需要胶水就能组装出基本的盒子。正如在照片中看到的那样,额外的部分以及内部空隙必须被粘在适当的地方。
The last thing to do is to glue the lid together and place the handle on top of it.
最后一步是将所有的隔板用胶水粘起来。

完工!