1、程序介绍
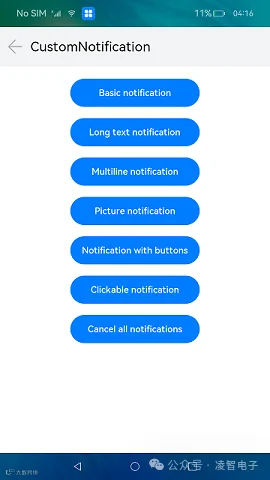
本示例展示了如何初始化不同类型通知的通知内容以及通知的发布、取消,包括基本类型、长文本类型、多行文本类型、图片类型、带按钮的通知、点击可跳转到应用的通知。
本案例已在OpenHarmony凌蒙派-RK3568开发板验证通过,具体代码可参考:https://gitee.com/Lockzhiner-Electronics/lockzhiner-rk3568-openharmony/tree/master/samples/d04_CustomNotification
API接口:9
2、知识准备
2.1、Notification模块
本模块提供通知管理的能力,包括发布、取消发布通知,创建、获取、移除通知通道,订阅、取消订阅通知,获取通知的使能状态、角标使能状态,获取通知的相关信息等。
以下将简要讲解本次实验应用的知识点。如需详细接口说明,请参看:Notification模块官方说明
2.1.1、导入模块
import Notification from '@ohos.notification';
2.1.2、Notification简介
// 导入模块
import Notification from '@ohos.notification';

// notification模块
declare namespace notification {
           // 发布通知
    function publish(request: NotificationRequest, callback: AsyncCallback<void>): void;
           // 取消通知
    function cancel(id: number, callback: AsyncCallback<void>): void;
           // 取消所有
    function cancelAll(callback: AsyncCallback<void>): void;
           // 获取当前应用的活动通知数
    function getActiveNotificationCount(callback: AsyncCallback<number>): void;
           // 获取所有有效的通知
    function getActiveNotifications(callback: AsyncCallback<Array<NotificationRequest>>): void;

  // 省略部分API
}
(1)publish:发布一条通知,NotificationRequest 参数说明如下:
id:通知ID,可通过此ID取消该通知。
content:通知内容。
isUnremovable:是否可移除。
extraInfo:扩展参数。
smallIcon:通知小图标。
largeIcon:通知大图标。
isFloatingIcon:是否显示状态栏图标。
wantAgent:点击通知跳转的WantAgent。
autoDeletedTime:通知自动清楚的时间。
(2)cancel:取消与指定 id 相匹配的已发布通知。
(3)cancelAll:取消所有已发布的通知。
(4)getActiveNotificationCount:获取当前应用的活动通知数。
(5)getActiveNotifications:获取当前应用的所有活动通知。
2.1.3、publish函数
Notification.publish(request: NotificationRequest): Promise<void>
作用:发布通知(Promise形式)。
参数:
| 参数名 | 类型 | 必填 | 说明 |
|---|---|---|---|
| request | NotificationRequest | 是 | 用于设置要发布通知的内容和相关配置信息。 |
示例:
// 通知Request对象
let notificationRequest = {
    notificationId: 1,          //
    content: {                  // 通知内容
        contentType: Notification.ContentType.NOTIFICATION_CONTENT_BASIC_TEXT,  // 通知类型
        normal: {
            title: "test_title",                    // 通知内容的标题
            text: "test_text",                      // 通知内容的文本
            additionalText: "test_additionalText"   // 通知附加内容,是对通知内容的补充。
        }
    }
};
Notification.publish(notificationRequest).then(() => {
            console.info("publish success");
});
2.1.4、ContentType类型
系统能力:以下各项对应的系统能力均为SystemCapability.Notification.Notification
| 名称 | 值 | 说明 |
|---|---|---|
| NOTIFICATION_CONTENT_BASIC_TEXT | NOTIFICATION_CONTENT_BASIC_TEXT | 普通类型通知。 |
| NOTIFICATION_CONTENT_LONG_TEXT | NOTIFICATION_CONTENT_LONG_TEXT | 长文本类型通知。 |
| NOTIFICATION_CONTENT_PICTURE | NOTIFICATION_CONTENT_PICTURE | 图片类型通知。 |
| NOTIFICATION_CONTENT_CONVERSATION | NOTIFICATION_CONTENT_CONVERSATION | 社交类型通知。 |
| NOTIFICATION_CONTENT_MULTILINE | NOTIFICATION_CONTENT_MULTILINE | 多行文本类型通知。 |
3、程序解析
3.1、创建NotificationOperations对象
NotificationOperations主要用来发布不同类型的通知。具体流程如下:
首先,引入Notification模块。
import {
    logger,
    notificationUtil,
    notificationContentUtil,
    notificationRequestUtil,
    wantAgentUtil
}   from '@ohos/notification'
import notification from '@ohos.notificationManager'
其次,定义一个NotificationOperations类。
export default class NotificationOperations {
    private context: Context = undefined
    private basicContent: notification.NotificationBasicContent = undefined
  ......
}
NotificationOperations类定义为默认类对象,方便主页面调用。
最后,在NotificationOperations类中声明不同类型的通知,以供主页面调用。
3.1.1、发布基本类型通知
publishBasicNotification = () => {
    try {
      logger.info(TAG, `publishBasicNotification`)
      this.basicContent.title = this.context.resourceManager.getStringSync($r('app.string.basic_notification'))
      let notificationContent = notificationContentUtil.initBasicNotificationContent(this.basicContent)
      // 发布普通类型通知
      notificationUtil.publishNotification(notificationRequestUtil.initBasicNotificationRequest(notificationContent), NOTIFICATION_ID.BASIC)
    } catch (error) {
      logger.info(TAG, `publishBasicNotification error, error = ${JSON.stringify(error)}`)
    }
}
3.1.2、发布长文本类型通知
publishLongTextNotification = () => {
    try {
      logger.info(TAG, `publishLongTextNotification`)
      this.basicContent.title = this.context.resourceManager.getStringSync($r('app.string.long_text_notification'))
      let notificationLongText = this.context.resourceManager.getStringSync($r('app.string.notification_long_text'))
      let notificationBriefText = this.context.resourceManager.getStringSync($r('app.string.notification_brief_text'))
      let notificationExpandedText = this.context.resourceManager.getStringSync($r('app.string.notification_expanded_title'))
      let notificationContent = notificationContentUtil.initNotificationLongTextContent(this.basicContent, notificationLongText, notificationBriefText, notificationExpandedText)
      notificationUtil.publishNotification(notificationRequestUtil.initBasicNotificationRequest(notificationContent), NOTIFICATION_ID.LONG_TEXT)
    } catch (error) {
      logger.info(TAG, `publishLongTextNotification error, error = ${JSON.stringify(error)}`)
    }
}
3.1.3、发布多行文本类型通知
publishMultiLineNotification = () => {
    try {
      logger.info(TAG, `publishMultiLineNotification`)
      this.basicContent.title = this.context.resourceManager.getStringSync($r('app.string.multiline_notification'))
      let notificationBriefText = this.context.resourceManager.getStringSync($r('app.string.notification_brief_text'))
      let notificationLongTitle = this.context.resourceManager.getStringSync($r('app.string.notification_expanded_title'))
      let notificationContent = notificationContentUtil.initNotificationMultiLineContent(this.basicContent, notificationBriefText, notificationLongTitle, MULTI_LINE_CONTENT)
      notificationUtil.publishNotification(notificationRequestUtil.initBasicNotificationRequest(notificationContent), NOTIFICATION_ID.MULTI_LINE)
    } catch (error) {
      logger.info(TAG, `publishMultiLineNotification error, error = ${JSON.stringify(error)}`)
    }
}
3.1.4、发布图片类型通知
publishPictureNotification = async () => {
    try {
      logger.info(TAG, `publishPictureNotification`)
      this.basicContent.title = this.context.resourceManager.getStringSync($r('app.string.picture_notification'))
      let notificationBriefText = this.context.resourceManager.getStringSync($r('app.string.notification_brief_text'))
      let notificationExpandedText = this.context.resourceManager.getStringSync($r('app.string.notification_expanded_title'))
      let imageArray = await this.context.resourceManager.getMedia($r('app.media.notification_icon').id)
      let imageResource = image.createImageSource(imageArray.buffer)
      let picture = await imageResource.createPixelMap()
      let notificationContent = notificationContentUtil.initNotificationPictureContent(this.basicContent, notificationBriefText, notificationExpandedText, picture)
      notificationUtil.publishNotification(notificationRequestUtil.initBasicNotificationRequest(notificationContent), NOTIFICATION_ID.PICTURE)
    } catch (error) {
      logger.info(TAG, `publishPictureNotification error, error = ${JSON.stringify(error)}`)
    }
}
3.1.5、发布带按钮的通知
publishNotificationWithButtons = async () => {
    try {
      logger.info(TAG, `publishNotificationWithButtons`)
      this.basicContent.title = this.context.resourceManager.getStringSync($r('app.string.notification_with_buttons'))
      let actionButtons = [
        {
          title: this.context.resourceManager.getStringSync($r('app.string.first_button')),
          wantAgent: await wantAgentUtil.createWantAgentForCommonEvent('')
        },
        {
          title: this.context.resourceManager.getStringSync($r('app.string.second_button')),
          wantAgent: await wantAgentUtil.createWantAgentForStartAbility(BUNDLE_NAME, ABILITY_NAME)
        }
      ]
      let notificationContent = notificationContentUtil.initBasicNotificationContent(this.basicContent)
      let notificationRequest = notificationRequestUtil.initButtonNotificationRequest(notificationContent, actionButtons)
      notificationUtil.publishNotification(notificationRequest, NOTIFICATION_ID.BUTTON)
    } catch (error) {
      logger.info(TAG, `publishNotificationWithButtons error, error = ${JSON.stringify(error)}`)
    }
}
3.1.6、发布点击跳转到应用的通知
publishNotificationWithWantAgent = async () => {
    try {
      logger.info(TAG, `publishNotificationWithWantAgent`)
      this.basicContent.title = this.context.resourceManager.getStringSync($r('app.string.clickable_notification'))
      let notificationWantAgent = await wantAgentUtil.createWantAgentForStartAbility(BUNDLE_NAME, ABILITY_NAME)
      let notificationContent = notificationContentUtil.initBasicNotificationContent(this.basicContent)
      let notificationRequest = notificationRequestUtil.initWantAgentNotificationRequest(notificationContent, notificationWantAgent)
      notificationUtil.publishNotification(notificationRequest, NOTIFICATION_ID.WANTAGENT)
    } catch (error) {
      logger.info(TAG, `publishNotificationWithWantAgent error, error = ${JSON.stringify(error)}`)
    }
}
3.2、主页面
主页面负责定义按钮以及调用发布函数。
import router from '@ohos.router'
import NotificationOperations from '../feature/NotificationOperations'
import { notificationUtil } from '@ohos/notification'

@Entry
@Component
struct Index {
  private notificationOperations: NotificationOperations = new NotificationOperations(getContext(this))

  @Builder TitleBar() {
    Row() {
      Image($r('app.media.ic_back'))
        .size({ width: 30, height: 30 })
        .margin({ left: 12 })
        .onClick(() => {
          router.back()
        })
      Text($r('app.string.MainAbility_label'))
        .fontSize(24)
        .margin({ left: 12 })
    }
    .width('100%')
    .height(70)
    .backgroundColor('#F1F3F5')
  }

  @Styles buttonStyle(){
    .width(230)
    .height(50)
    .margin(10)
  }

  build() {
    Column() {
      this.TitleBar()
      Scroll() {
        Flex({ wrap: FlexWrap.Wrap, justifyContent: FlexAlign.Center }) {
          Button($r('app.string.basic_notification'))
            .buttonStyle()
            .onClick(this.notificationOperations.publishBasicNotification)
          Button($r('app.string.long_text_notification'))
            .buttonStyle()
            .onClick(this.notificationOperations.publishLongTextNotification)
          Button($r('app.string.multiline_notification'))
            .buttonStyle()
            .onClick(this.notificationOperations.publishMultiLineNotification)
          Button($r('app.string.picture_notification'))
            .buttonStyle()
            .onClick(this.notificationOperations.publishPictureNotification)
          Button($r('app.string.notification_with_buttons'))
            .buttonStyle()
            .onClick(this.notificationOperations.publishNotificationWithButtons)
          Button($r('app.string.clickable_notification'))
            .buttonStyle()
            .onClick(this.notificationOperations.publishNotificationWithWantAgent)
          Button($r('app.string.cancel_all_notifications'))
            .buttonStyle()
            .onClick(()=>{
              notificationUtil.cancelAllNotifications()
            })
        }
        .width('100%')
        .padding(12)
      }
      .layoutWeight(1)
    }
    .width('100%')
    .height('100%')
  }

  aboutToAppear() {
    notificationUtil.enableNotification()
  }
}
4、项目编译
4.1、打开项目
打开DevEco Studio,再打开自定义通知项目。
4.2、编译程序
点击菜单栏上的“Build” -> "Rebuild Project"。如果出现无法编译,则注意查看Event Log界面。如下所示:
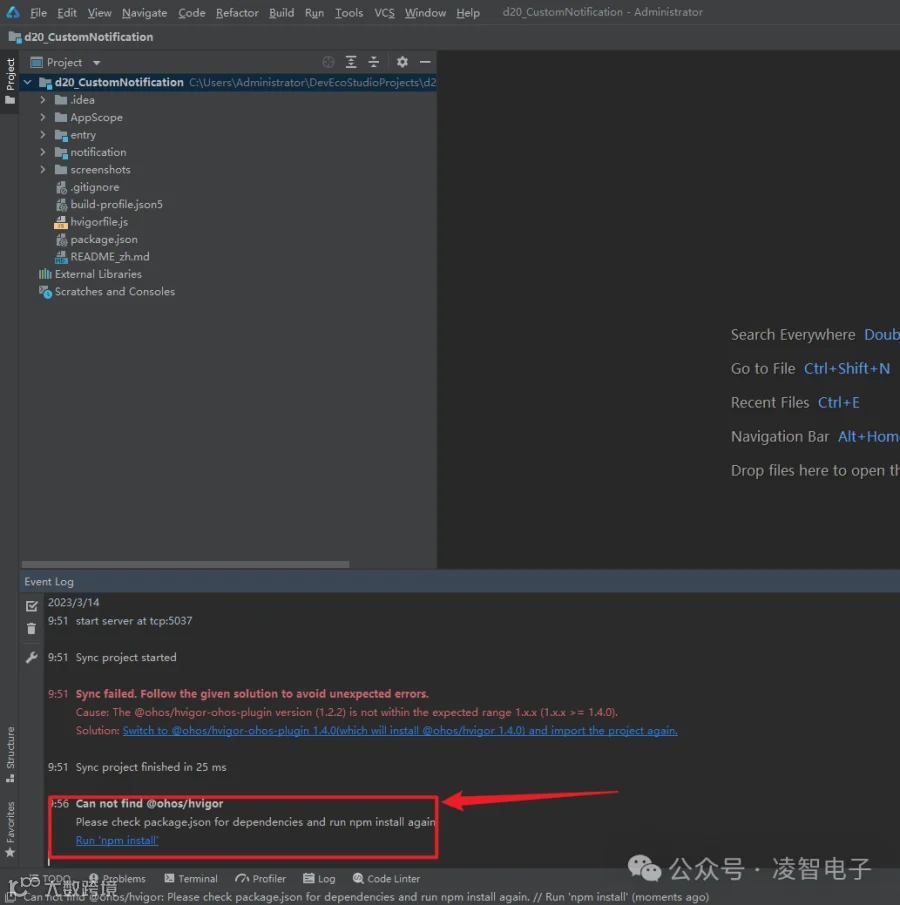
点击Run 'npm install',让DevEco Studio安装相关依赖包。
重新点击菜单栏上的“Build” -> "Rebuild Project"。出现如下错误:
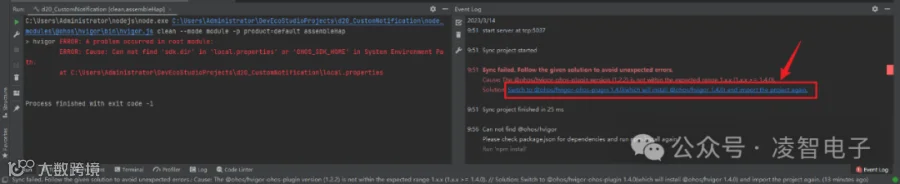
点击上图红色框部分,安装相关服务。
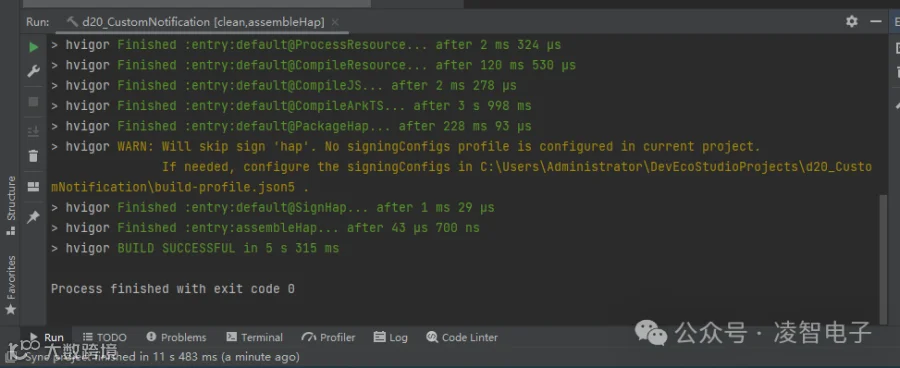
重新点击菜单栏上的“Build” -> "Rebuild Project",编译成功。
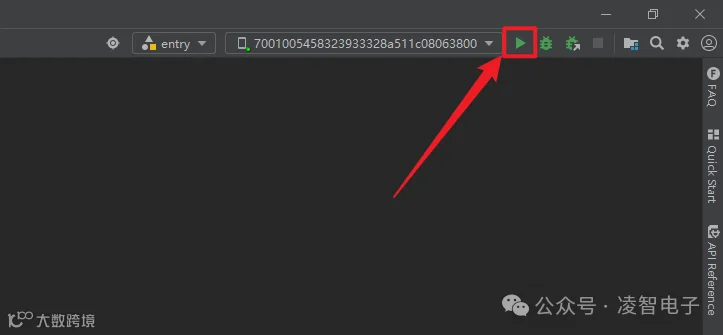
4.3、安装程序
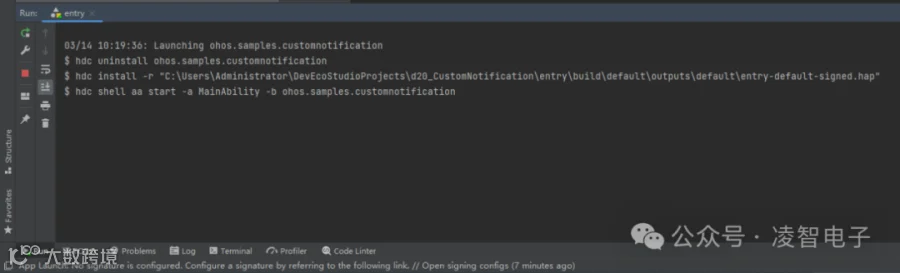
点击“entry”按钮,将项目程序安装到设备端。如下图所示:
如果出现下述报错,表示无法安装。如图所示:
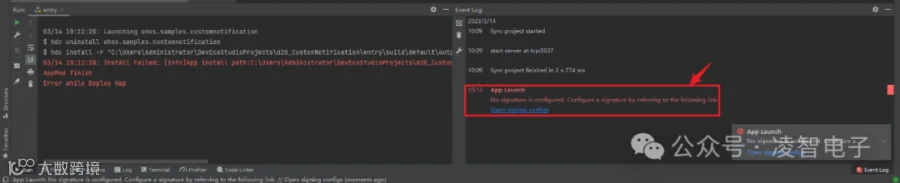
点击上图红色框的蓝色字体,弹出"Project Structure"对话框,点击"Apply",再点击"OK"。如图所示:
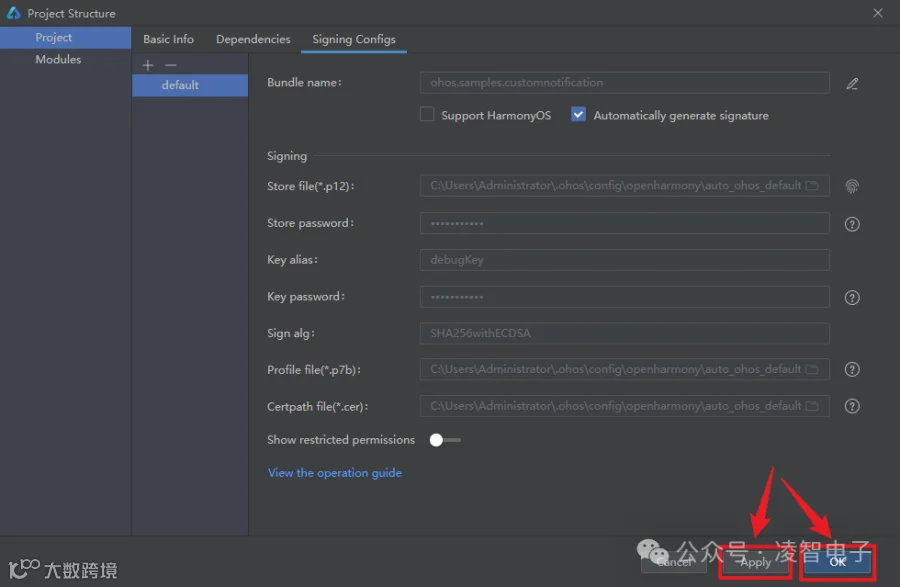
重新点击“entry”按钮,将项目程序安装到设备端。
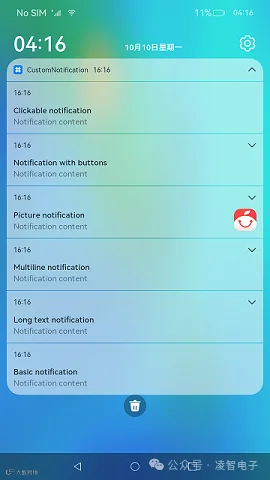
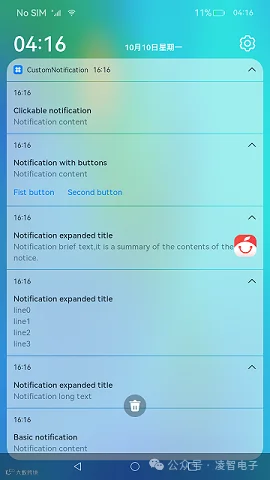
5、运行结果