

Stone-coated metal solar roof tiles are revolutionizing the roofing industry by combining durability, aesthetics, and energy efficiency. If you're considering installing these innovative tiles, this step-by-step guide will walk you through the process while ensuring optimal performance and longevity.
The installation process for stone-coated metal solar roof tiles is similar to that of regular stone-coated metal roof tiles, with some key considerations for the solar connections. Here's a general step-by-step guide:
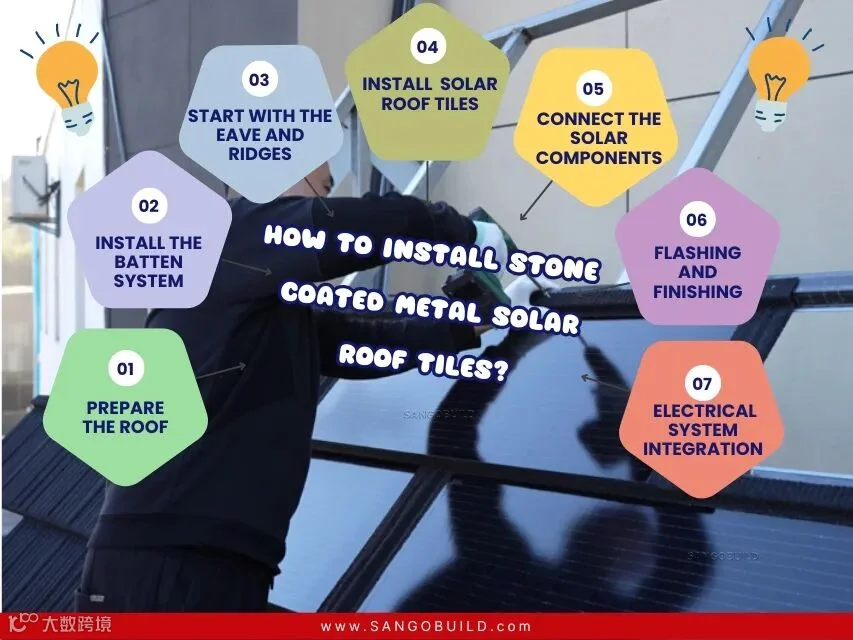
Step 1: Prepare the Roof
Ensure the roof deck is clean, dry, and structurally sound.
Install an underlayment (such as synthetic or self-adhering membrane) to provide additional waterproofing.
Step 2: Install the Batten System (If Required)
Some stone-coated metal solar tiles use a batten system, while others allow direct-to-deck installation.
If using battens, secure them according to the manufacturer's specifications, ensuring proper spacing for ventilation and drainage.
Step 3: Start with the Eave and Ridges
Install starter strips along the eaves to provide support and proper alignment for the first row of tiles.
If ridge ventilation is needed, leave space at the ridge to accommodate the vent system.

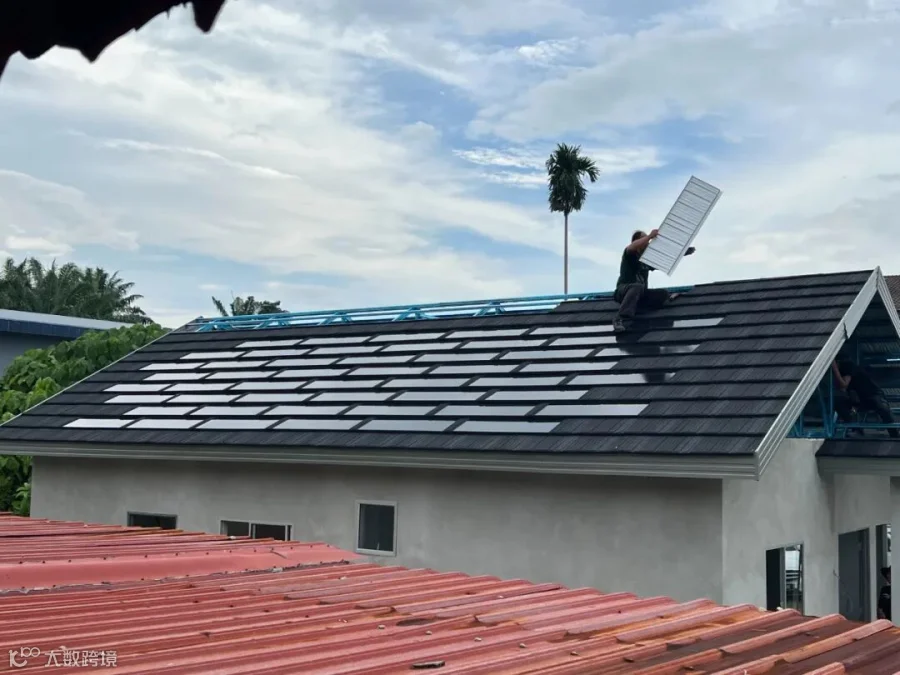
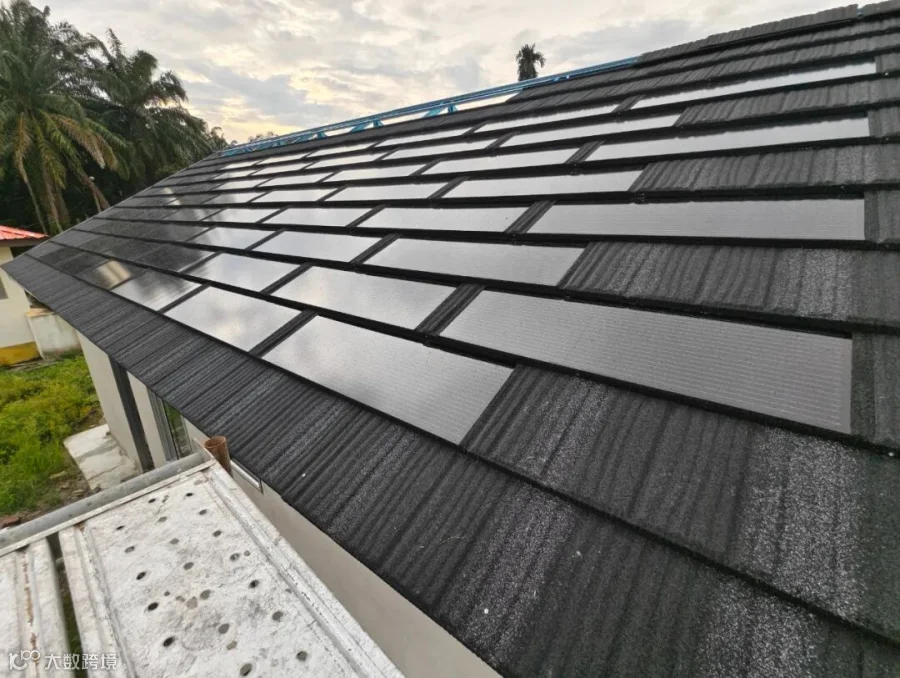
Step 4: Install the Stone-Coated Metal Solar Tiles
Start installing the tiles from the bottom edge of the roof, working your way up, overlapping each tile as specified by the manufacturer.
Secure each tile with corrosion-resistant screws or nails, typically placed in designated areas to ensure a hidden fastener system.
Ensure proper interlocking between tiles to prevent water infiltration.
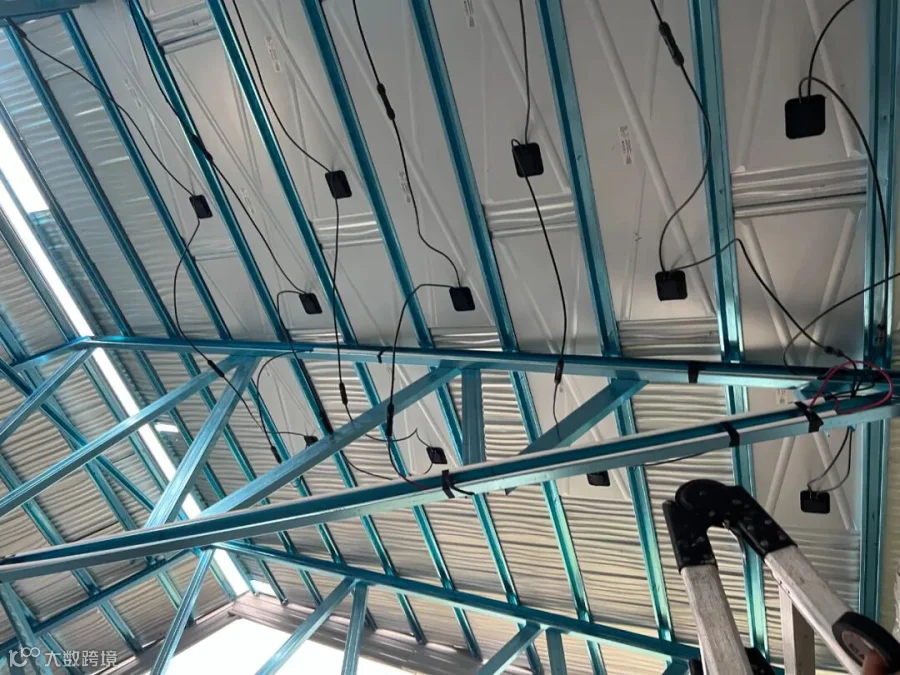
Step 5: Connect the Solar Components
As you install each solar tile, carefully connect the built-in electrical wiring following the provided layout.
Run the cables through designated pathways to connect them to the inverter or charge controller.
Use waterproof connectors to ensure a secure and weather-resistant connection.
Step 6: Flashing and Finishing
Install flashing around roof penetrations such as chimneys, vents, and skylights.
Secure ridge caps and side trims to complete the roof and provide a polished look.
Step 7: Electrical System Integration
Connect the solar array to the inverter and ensure proper grounding.
Conduct a final system inspection to verify that all wiring is securely connected and compliant with local electrical codes.
Perform system testing to confirm energy output and safety functionality.
Final Checks
Inspect for proper alignment, secure fastening, and weatherproof sealing.
Ensure there are no gaps or misaligned tiles that could lead to leaks or wind damage.
By following these steps, you can ensure a professional installation of stone-coated metal solar roof tiles that maximizes both functionality and visual appeal.