Source: Youtube
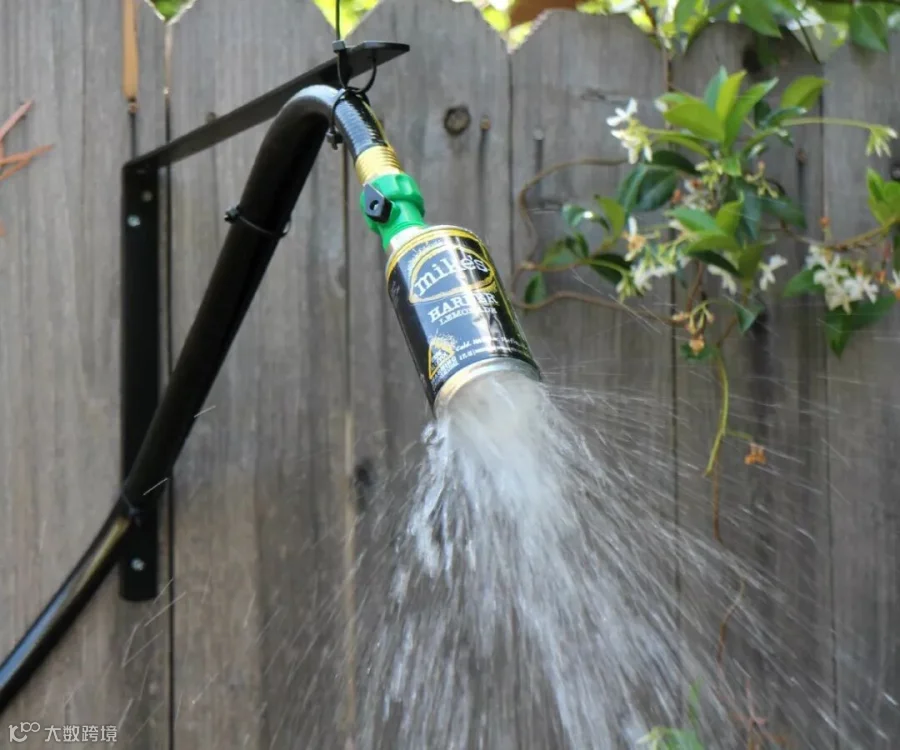
Picture this, you are having a backyard party at your beach house. A host of sandy folks intend to go in your freshly cleaned house. What will prevent this from happening? An outdoor shower of course!
Making an outdoor shower may be easier than you consider.

Step 1: Supply List
(x1) 100 foot long black garden hose
(x2) large/small shelf bracket
(x6) 5/8" stainless wood screws
(x1) 3/4" Male / Female garden hose fitting
(x1) O ring hose washer
(x6) 14" black zip ties
(x1) aluminum can
(x1) bag of large smooth stones (I got mine at Home Depot)

Step 2: Mark It
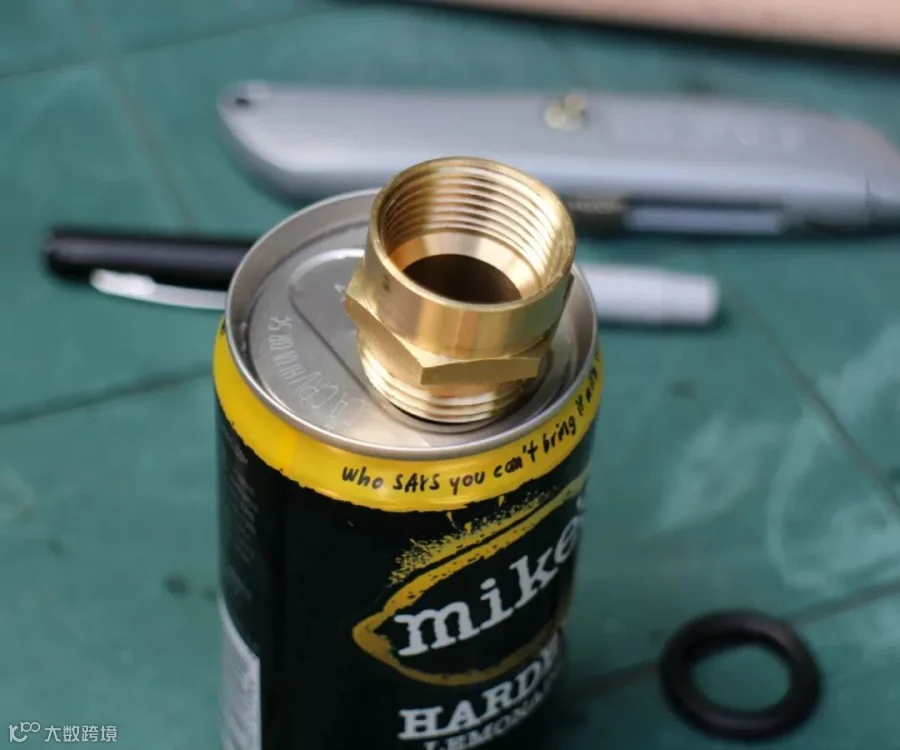
Remove the tab and take the hose fitting without the valve and place the male threaded side down on top of the can, so that it's circumference lines up as best as possible with the drink hole in the can.

Step 3: Make It Holey
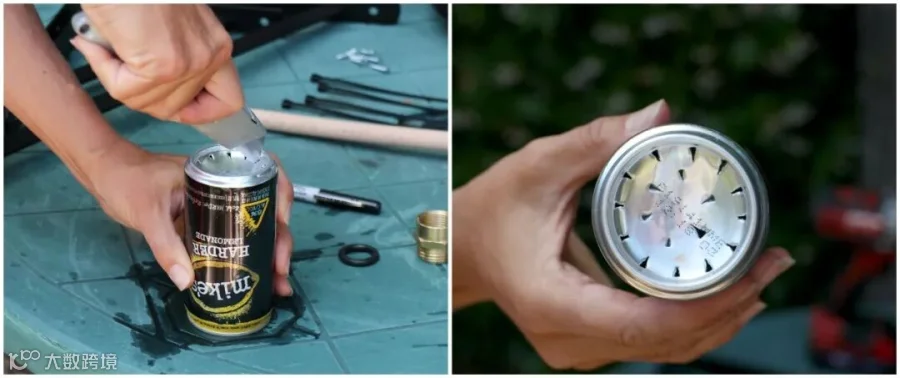
Carefully puncture holes into the bottom of the can. Do this by lightly pressing the blade tip into the soft aluminum and then twisting the blade back and forth a little bit.

Step 4: Get Connected
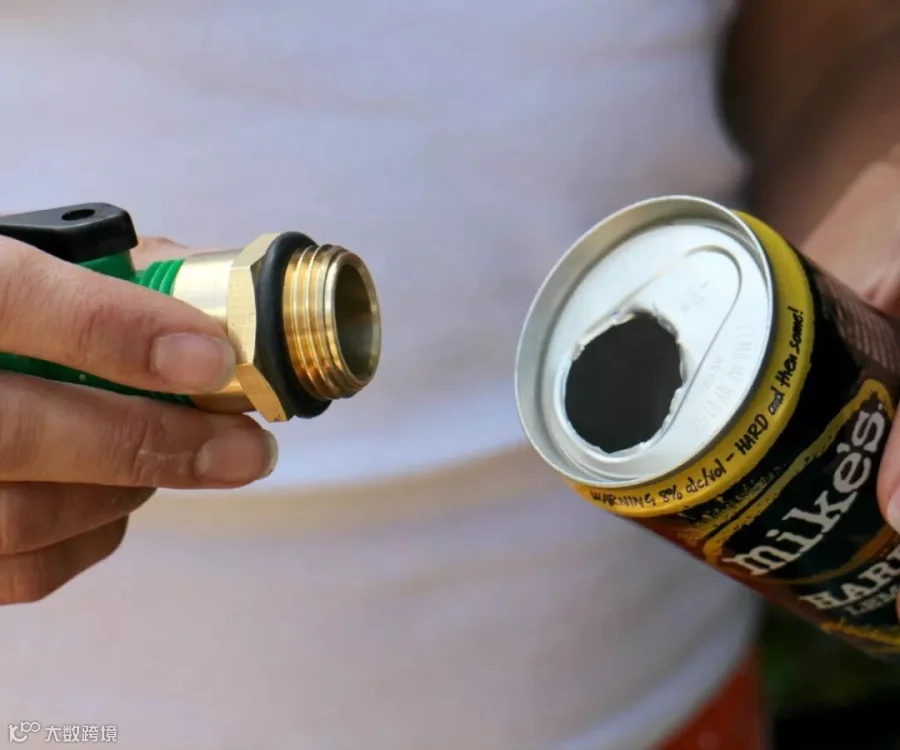
Carefully screw the male threads of the bottom non-valve fitting into the cut out hole of the can. Screw it in until you see the rubber O-ring squish a bit.

Step 5: Installing the Brackets
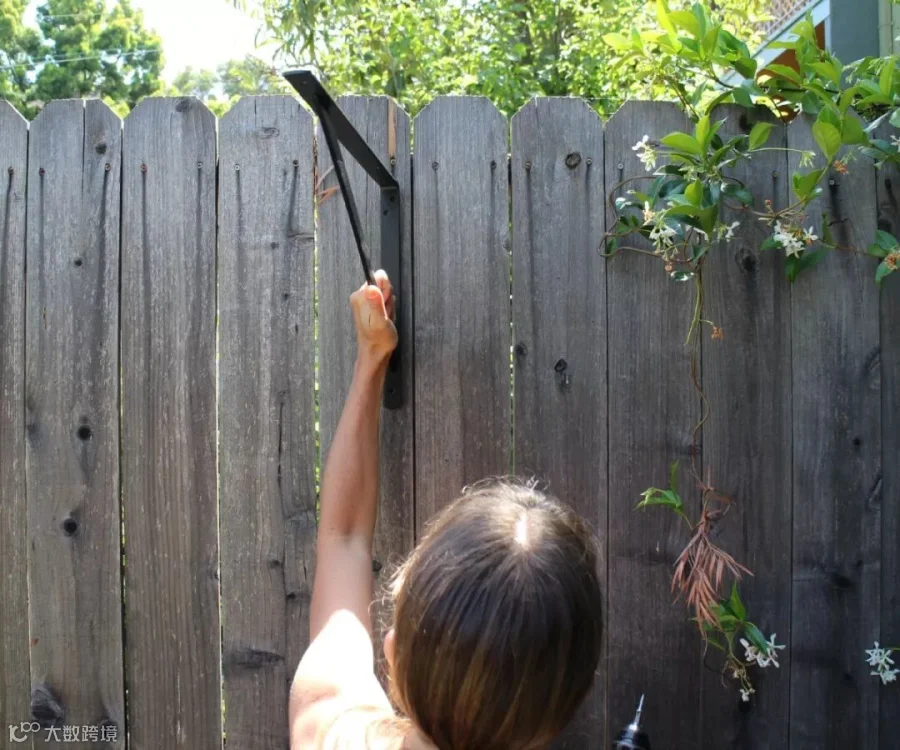
This system is best installed on a fence that gets some sunlight in the earlier part of the day. So once you've picked out your spot, use the screws and drill to attach the large bracket to the fence.

Step 6: Getting Vertical
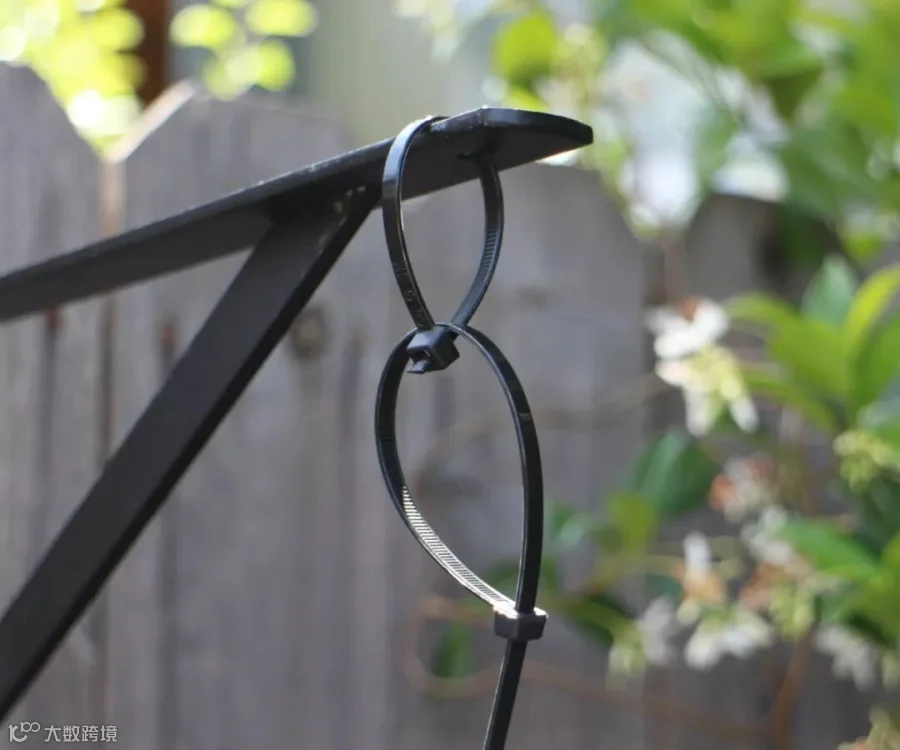
Take a zip tie and make a loose loop going through the hole at the end of the large bracket. Make a second loop connected to the first.

Step 7: Getting It Together
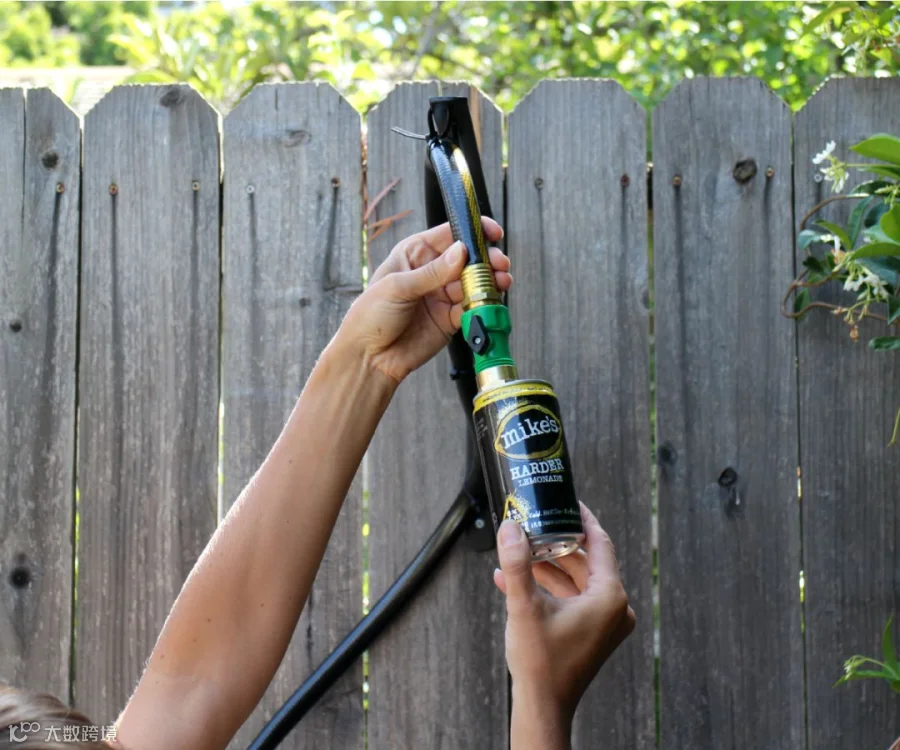
Screw the can shower head onto the end of the hose.

Step 8: Testing, Testing
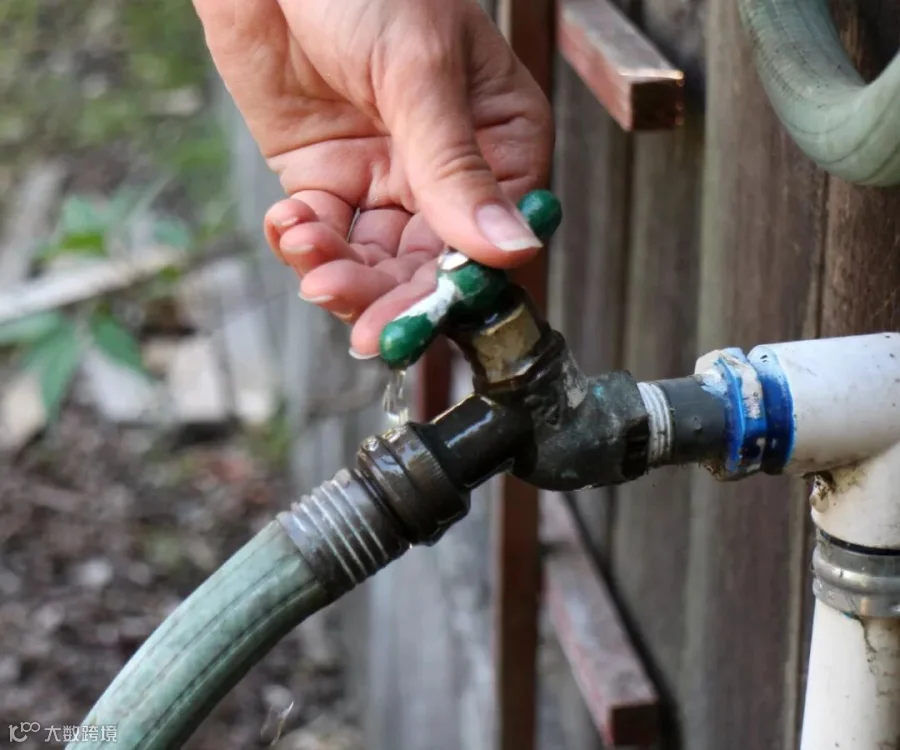
Turn the faucet on, just a quarter turn so that there isn't a huge amount of water pressure.

Step 9: Get Stoned
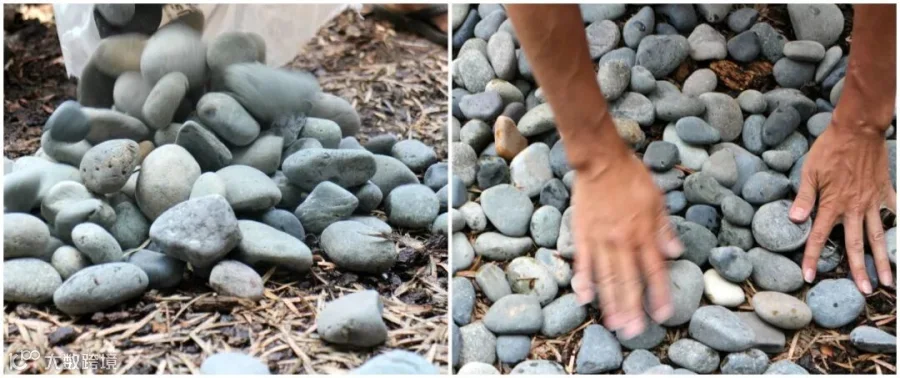
Dump out your bag of stones where the shower water landed and spread a nice thin layer of them into a circle. These will help keep your feet from getting muddy.
If you have a big yard or go camping frequently, give it a try!
Source: instructables